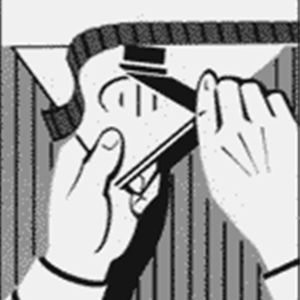
Use the spatula (trimmer) and cutting tool to trim off the excess paper at the top and bottom of the web. Move both tools at the same time for an even cut. Sponge the entire strip, including the woodwork and ceiling, to remove excess glue (be sure to rinse the sponge with clean water after each use). Continue to the next lane, don't overlap the seams!
How to apply SeaStone Flex( )
Tools you can use when applying SeaStone Flex( )
Prepare your walls
Before applying SeaStone Flex, your walls must be prepared first. Taking the time to get your walls ready will make the job so much easier! If you haven't already, read our wall preparation guide.
Start right
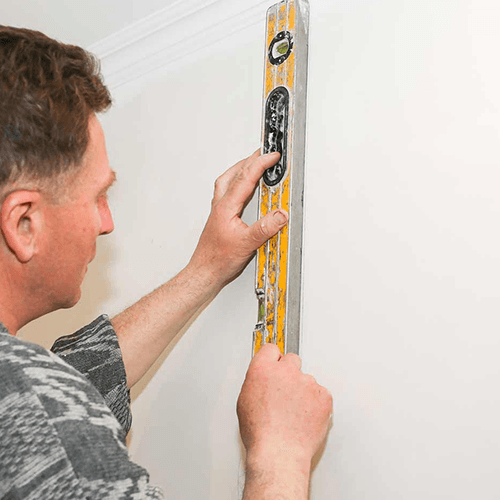
Your wallpaper project will be a success if the very first SeaStone Flex run is hung straight. To get it right, measure the width of your backdrop and subtract 1.5cm from that. Measure and mark this distance from your starting point (a corner or doorway). Draw a vertical line using a spirit level or a simple tool called a plumb line, which can be found at any hardware store.
For your plumb bob, attach the weight to one end of the cord and rub the cord with chalk. Secure the line in place on the wall and drop the weight just above the floor or baseboard. When the weight stops swinging, grab the bottom of the cord and hold it tight. With your other hand, pull the cord away from the wall and release it. This chalk line is your starting point.
"Prepare wall"
"SeaStone Flex Places."

are you stuck?
Contact us
Return to the previous page
Privacy Policy SeaStone
General Terms and Conditions SeaStone
SeaStone Garanties
Office hours
- Mon - Fri
- -
- Saturday
- -
- Sunday
- Closed
Interior Left:
www.folin.nl
www.seastone.nl
www.vintroeurope.nl
of Marne 34 K
8701 PT, Bolsward
Friesland, The Netherlands
SeaStone Products
SeaStone Flexpanels
SeaStone Flex ( ) New
SeaStone Imprex
SeaStone Marble
SeaStone Metallics
SeaStone Metallic Varnish
SeaStone Shine
SeaStone Pigment
SeaStone Unsealed Chalkpaint
SeaStone Hechtprimers
SeaStone Concrete Look Paint
SeaStone Marble
SCM Color System
To contact us
31 (0)85-060 2817
info@seastone.nl
Read our Blogs here
Partners Netherlands:
The Paint Farmer Lemmer
www.seastonefriesland.nl
Dealers Netherlands:
(SeaStone Kitchen Walls)
Deco Kitchen
Pump maker 5
8447 GJ Heerenveen
www.decokeuken.nl
Zania Keukens
Grootsand 66
8601 AZ Sneek
www.zania-keukens.nl
Deco Advertising work Bolsward
de Marne 32 A
8701 PT Bolsward
www.decoreclamewerk.nl
Click here for the overview
Our company has SGS ISO 9001 and SGS ISO 14001, Applus ISO 9001 and CE (European Conformity) certification.

webbuilder BRANDBUNK®


